I’m going to show you how easy and cheap it is to build a personal website, to stand out as a freelancer and professional. A personal website shows dedication and makes you look more professional and experienced. The best part: it’s actually easier and cheaper than you think, you can complete it during a rainy Saturday for example.
Why it’s important to stand out as a freelancer and professional?
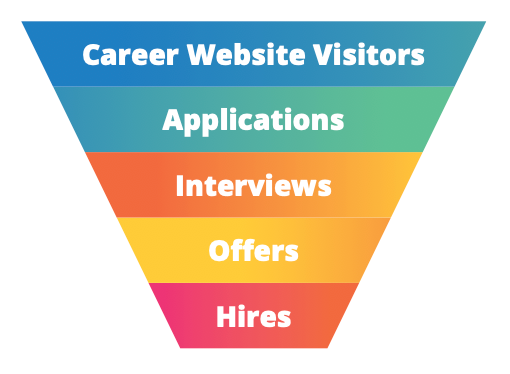
The whole funnel between job applications and hires filters the vast majority of the professionals. According to Jobvite, only 2% of people that apply for a job are hired. That’s a small number if you ask me.

The application stage is key, it’s when you need to use every ammunition you have. A personal website is very useful, professional, and will make you stand out from the crowd. This way, you are going to reach that interview stage and get people to know you.
Okay, you convinced me, but how easy and cheap it is?
If you are a front-end developer, you are probably thinking about a great website, using the latest tools, and great architecture. The fact is, potential clients, do not care about that.
Chances are, you already have thought about building a personal website but you procrastinated. It’s fine, you are busy working for your client, as you should, and personal things are relegated.
My suggestion: be pragmatic. A “set and forget” mentality will bring you peace of mind, and if later on, you want to build a more complex website so you can share the code on GitHub, then do it.
No experience in web development is required to build a simple, yet good, personal website to stand out as a freelancer, and professional. I’m going to show you how to build a single-page personal website that should contain at least the following sections:
- About
- Portfolio
- Testimonials
- Contact
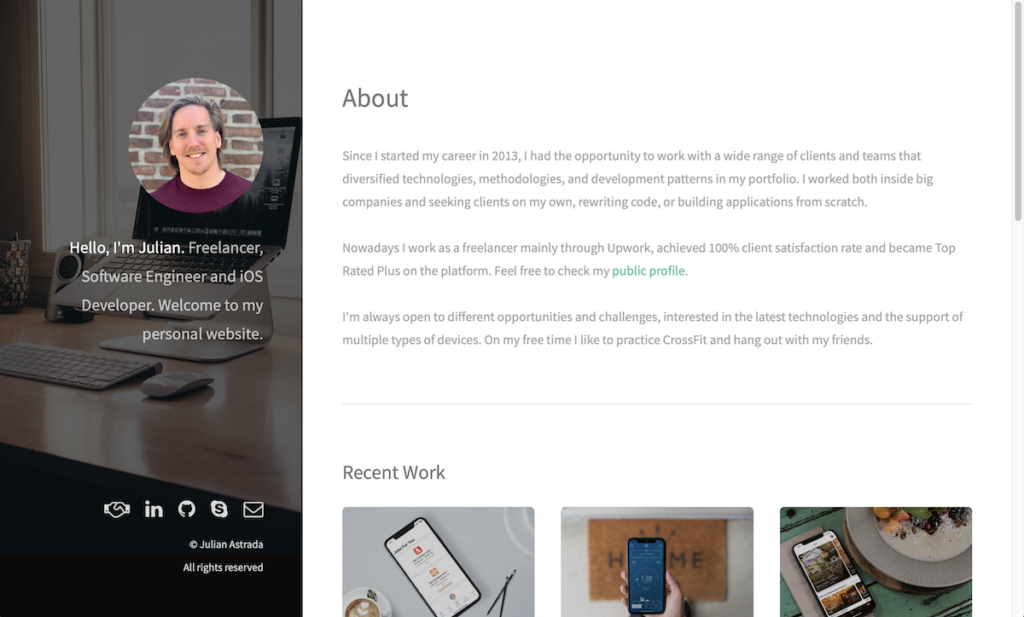
Next is a screenshot of the first website I built. It contained exactly those four sections. It not only did the trick, but I also received good comments without asking for them.

As you can see, it was a very simple yet elegant website. I started building it on a Saturday afternoon, and on the same day, it was up and running. Simple, easy, and elegant.
About the cost, the only thing you need to purchase is the domain. It can vary depending on where do you buy it, but it’s around $8.99 per year on Namecheap, for example.
Great, let’s do it
I’m going to describe the steps you should follow to have the website running, starting from scratch. These steps are concrete and precise, but I’m not going to specify how to install each tool. I’m adding links to official guides so you can do it easily.
Domain
The first step is to choose the domain name. Unless you have an established company or an established brand, you should just go with your name.
Your name is something that is always going to be relevant and is always going to make sense. Making it an easy and safe choice. The standard domain format when using your name is:
www.<first_name><last_name>.com
Of course, you can use an initial or any alternative if your name is too long or something like that.
To purchase it, you need a domain name registrar. There are plenty of options to choose from like Namecheap, GoDaddy, Bluehost, etc. Most of them offer hostings as well, in case you are interested. For now, a domain name is all you need.
Firebase
Firebase is the tool I used to deploy the website. It’s the “set and forget” part of the process. Later, you are going to connect Firebase with your domain registrar to display your website, for free.
Here is a brief description of the steps you should follow:
- Create a Firebase project on the Firebase Console.
- Install Firebase on your computer, you can use npm. Here is a guide describing how to do it.
- Initialize Firebase
- Using the terminal, go to the desired folder and type
firebase init - When asked which CLI features you want to install, select
Hosting - When asked about the project setup, select
Use an existing projectand select the one you created in step 1.
- Using the terminal, go to the desired folder and type
Firebase should now be set up. You can deploy the website for the first time using firebase deploy. This command will sync your local directory with your cloud deployment. Whenever you want to update the site, you simply need to run again firebase deploy.
Template
The next step is to search for a template. You need one that matches what you are looking for, and what you are trying to communicate. A quick google search will give you several options.
I used a template from HTML5 UP!, more precisely, the Strata template. There are plenty of options to choose from, and they are all responsive.
Once you downloaded a template, you need to edit the HTML. Here is where you are going to spend the majority of your time. You’ll need to open the file with a text editor and edit it.
Like I mentioned earlier, you’ll need the four basic sections. About, Portfolio, Testimonials, and Contact. Feel free to add anything else you consider relevant.
Once you finished, replace the firebase index.html with the one you edited and any other files you need. A good piece of advice is to create a private git repository and upload your website there.
Connect Firebase and your domain registrar
Finally, you will need to connect Firebase with your domain registrar of choice.
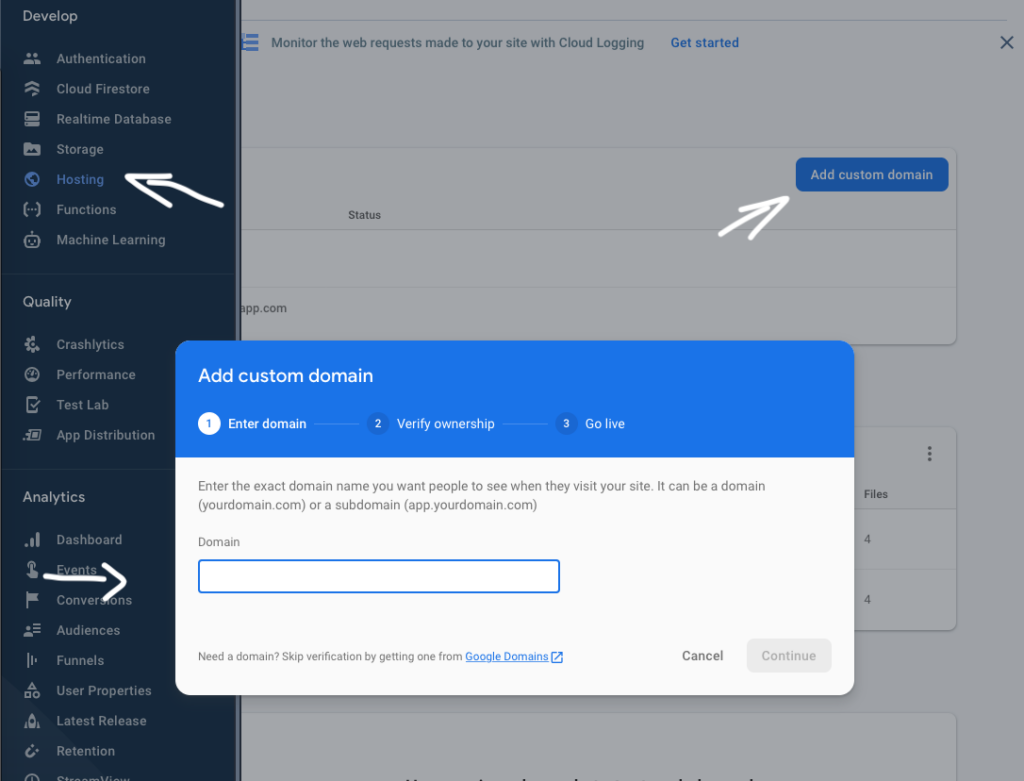
Head over to Firebase Console again, select your project, select “Hosting” from the sidebar, and select “Add a custom domain”.

Enter your domain, and you’ll be given a TXT record. In your domain registrar’s settings, set the hostname and value to the values given to you like the new TXT record.
Once it’s verified, you are going to need to point the domain at Firebase. Firebase will give you two IP addresses to add to your domain. Replace any existing “A Records” you may have.
Your site will show a red HTTPS warning for a little bit, while Firebase provisions a free SSL certificate for you automatically. You don’t need to do anything as this process is automatic.
Whenever you need to deploy updates, make changes to the code in the public folder, and run firebase deploy again from your terminal. You should see changes deployed in under a minute.
Time to stand out as a freelancer and professional
Now that you have your site ready for the public it’s time to spread the word. Some basic places where you should include your website are:
- Resume.
- LinkedIn profile.
- Email signature.
- Skype profile (or on any other communication app you use).
- GitHub profile.
- Stackoverflow profile.
Now you have a great static website sharing the information every client is interested in. Don’t forget to update it every once in a while.
